
How to Read a Tape Measure: Tips You Need to Know
One
of the most important skills you must learn as a do-it-yourselfer
(DIY-er) is how to read a tape measure, which is a vitally
important aspect of any home repair or home improvement
project. The saying "measure twice and cut once"
came from stories of many people who measured once, cut,
and then had to adjust, refit, re-measure, and re-cut
in a seemingly endless cycle until giving up in despair
and running, screaming, out into the night, never to be
seen again. Well, okay, maybe that's a bit of an exaggeration,
but the message is very clear: measure twice, cut once,
and be done with it. The other part of that old adage
is also obvious: make sure you have a good tape measure
and know how to read it.
Types of Tapes Measures
There are several tools for measuring various materials
to cut or shape, spaces you want to fill, or areas you
want to paint or finish, and you need to know how to read
a tape measure that is best suited for the job at hand.
All of them can be found with measurements shown in standard
(inch and foot) or metric (millimeters and meters), or
both. These are the popular types:
1. Standard retractable steel tapes are the most popular tape measures and are great for measuring short distances in and around the home (e.g., Stanley or Lufkin tape measures).
2. Folding rules, also known as "carpenter's rules" or "zigzag rules" are made of wood or metal. They are useful when you need a firm edge to mark a line for cutting.
3. Pocket calipers will measure inside and outside diameters.
4. A laser tape measure (e.g., Stanley) allows you to point at the target and hit the "read button" to get an exact measurement, often on an LCD screen, accurate to 100 feet. It's faster and easier than using a traditional tape measure and eliminates the need to learn how to read a tape measure in 1/16" increments.
5.
Digital tape measures also give you exact readouts. The
Bosch digital tape measure has a built-in memory to record
measurements; the Stanley can also do area calculations,
volumes, and add and subtract distances.
Other Measuring Tools
As well as the tool for measuring distance, you need a
tool for marking the measurements you have taken. Usually
a pencil and a straight edge will do just fine, but you
can also use other tools:
1. A chalk line - marks a very long line by stretching the chalk line (like a string) tightly between two points and then snapping the line at the center, which deposits chalk dust along the line.
2. A marking gauge - marks the lines parallel to a board with a sharp pin at the edge of the rule as the block moves along the board edge, and
4. A mortise gauge - has a pair of scribe points that mark two parallel lines at once.
3. A scratch awl - can be used instead of a pencil to scratch rather than draw the line.
 More
Tips
More
Tips
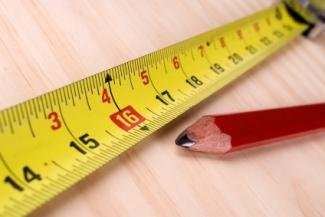
1. If you are reading a standard tape measure that has
foot and inch markings, the scale between the inch marks
is divided into 1/16" segments: the longest represents
1/2," the next is 1/4," then 1/8," and
finally 1/16." Studs are marked every 16".
2. When marking a measurement on wood or some other material, it's much better to use a "v" mark rather than just a line, with the point of the "v" right at the measurement mark.
3. Purchase tools that comes equipped with a laser guide that creates the perfect line to follow. You can mount one on your miter saw if it doesn't come with one by replacing the washer on the outer blade with a laser guide. Installation takes only a minute or two and transforms ordinary saws into laser guided miter saws with clear cutting lines, showing brightly even in daylight and on unevenly-shaped materials like fancy crown molding.
4. Keep your tape measure clean and marking tools sharp.
5. In a tight spot where you can't read the tape very good, stretch it out and lock it into place. Read the tape and add the length of the tape casing to your measurement. It is marked on the casing how much to add. This will give you an exact measurement with very little bending and strain on your back.
6. Every 12" it is marked in feet.
7.
On some tapes you'll also see a small black diamond every
19.2 inches. This is an alternative spacing mark for framing
materials.
Choose a reliable tape measure and learn the correct technique
for using it to ensure that all your projects get off
to a good start.
About
the Author:
Scott Gray is currently a home improvement handyman
enthusiast and freelance writer who enjoys providing tips
to consumers who are in the market for power and hand
tools.